This section allows you to configure the structure of groups. This is necessary at the very first stages of the company's launch.
The "Settings" and "Users" sections are interconnected. First, you need to create groups for future users. And after that, in the "Users" section, we can register and edit employees.
The Settings section allows you to customize the group structure. This is necessary at the very first stages of the company's launch.
Before creating users in the system, it is necessary to set the structure. I.e., create/upload a list of groups into which users will be distributed at the creation stage. Also, access to the content for users will be given by groups in the "Settings" section. Therefore, it is important to think through the group structure correctly.
At the launch stage, you are provided with a company. A structure has already been created in it (for example).
You can edit groups in it, rename them according to your structure, and delete unnecessary ones.
Opposite each one there is a pencil for editing and a trash can sign for deletion.
There is also a button to add a new root group.
Root groups can only be added by an administrator with the "Main Admin" role.
The root group is the name of the main group, which will contain many groups inside.
For example, a region is a root group, a city is a nesting. In the city, we create a list of cities (Paris, Lyon, etc.) - these are already nested groups in the "city". But they are all in the same branch of the root group "Region".

The number of root groups can be increased to 20 or reduced to 3
You can create nested groups in each root group. In 3 root group there can be up to 100 nested groups with further branching.
Also note that in our sample structure, there is a nested group "Administrator" in the root group "Assignment" - this is just an example. And the users you put in this group will not be administrators. You can delete or rename this group (like any other).
The main point of creating groups on the platform is the further convenience of assigning content. Thoughtlessly created groups complicate further administration of the platform, and the correct structure will greatly facilitate the work of administrators.
1.Import groups.
To add a large number of groups to the system or edit existing groups, the Import button is located in the upper-right corner of the group list screen in the Options menu.
By clicking on the "Import" button, a pop-up window "Import groups" appears and offers to download a template with a sample of filling in the import file "Template.xlsx"
There are 3 ways to edit group values:
Specifying the Group ID,
Specifying the full path to the group,
Specifying the name of the group.
To edit a group, it is enough to set at least one of the three columns for the specified tree, and the remaining columns can be omitted. If more than one column is filled in, the group is identified by the value of the higher priority column:
ID is more important than the full path, the full path is more important than the group name.
A detailed analysis of the import is available at the link: How to fill in the group import template in the Settings section..
2. Adding and editing groups manually
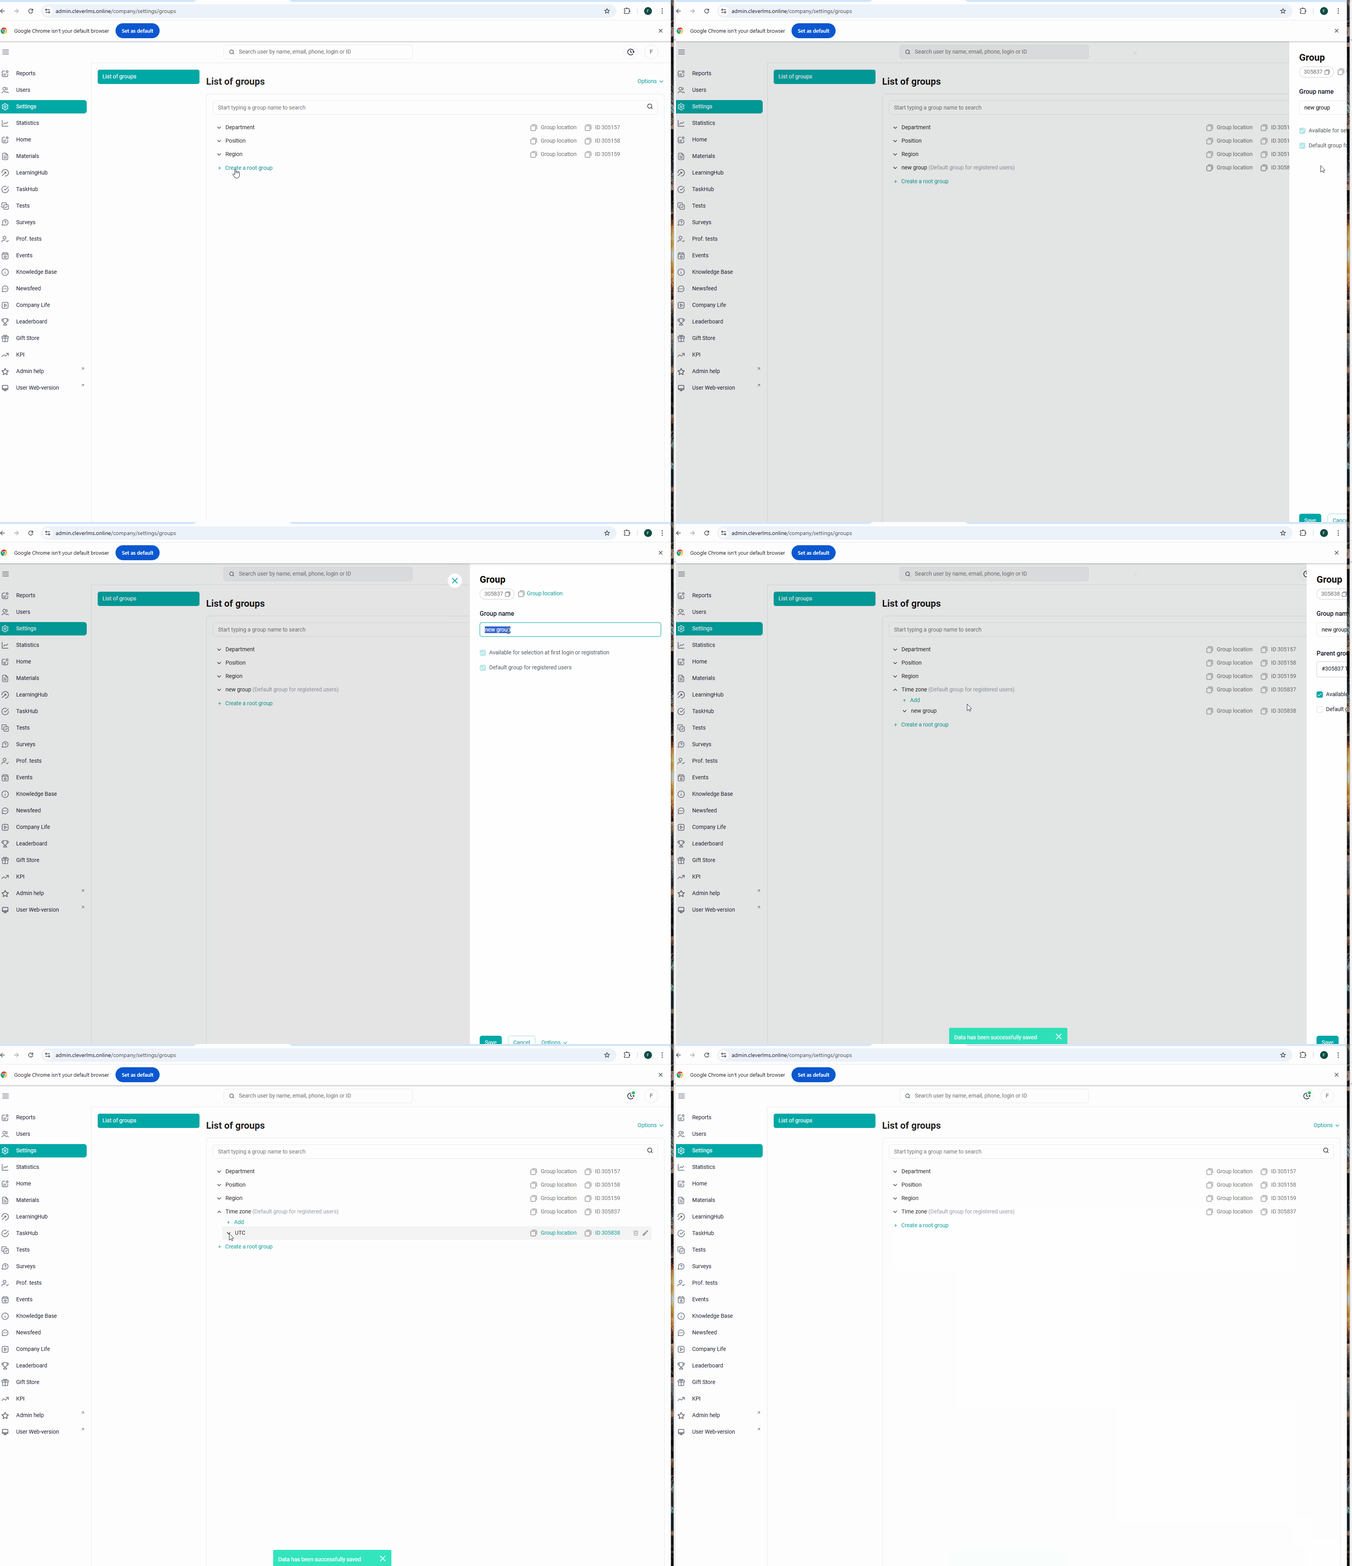
An example of adding a group manually:

If you need to edit any group, hover the cursor over it and a pencil will appear. By clicking on the pencil, you can make changes and save them. To search for the desired group, enter the search query in the search bar and press enter on the keyboard. Note. When any branch of the tree is opened, the first 50 values in this branch are loaded. If there are more values in the branch, then the Show more button is displayed on the 51st line. By clicking on it, the following 50 items are loaded. During the download, a download indicator is displayed next to the button. If all groups are loaded, the Show button is not displayed yet.
Available for selection at the first login or registration , This setting is used if self-registration is enabled in the company. Users are given the opportunity to select a group themselves when registering or when logging in for the first time after generation (if the corresponding flag was set during generation). If the checkbox is on, then the group will be available for users to select. Hidden when you first log in or register If the checkbox is on, then the group will not be available for users to select when registering or when logging in for the first time after generation. The default group for registering users It is installed for all root groups. You can make any group or subgroup in the root branch a default group. There should be one such group in each root branch. It is a group that users are automatically assigned to if: 1) The company has self-registration and users cannot select groups and there is no automatic assignment of groups by codeword; 2) The company has self-registration by code word (auto-assignment of groups) and the user has entered a code that is not registered on the platform. It is set by default for all root groups. Thus, you can independently set up a flexible and convenient structure for your company in the Settings section.
Before deleting groups, it is important to think about exactly where you are using them and what this will affect.
For example, you grant access to groups that you plan to delete. Or you have set up a report template in which they are needed.
If you are making adjustments to the existing group structure, then refer to the article: Changing the existing group structure.
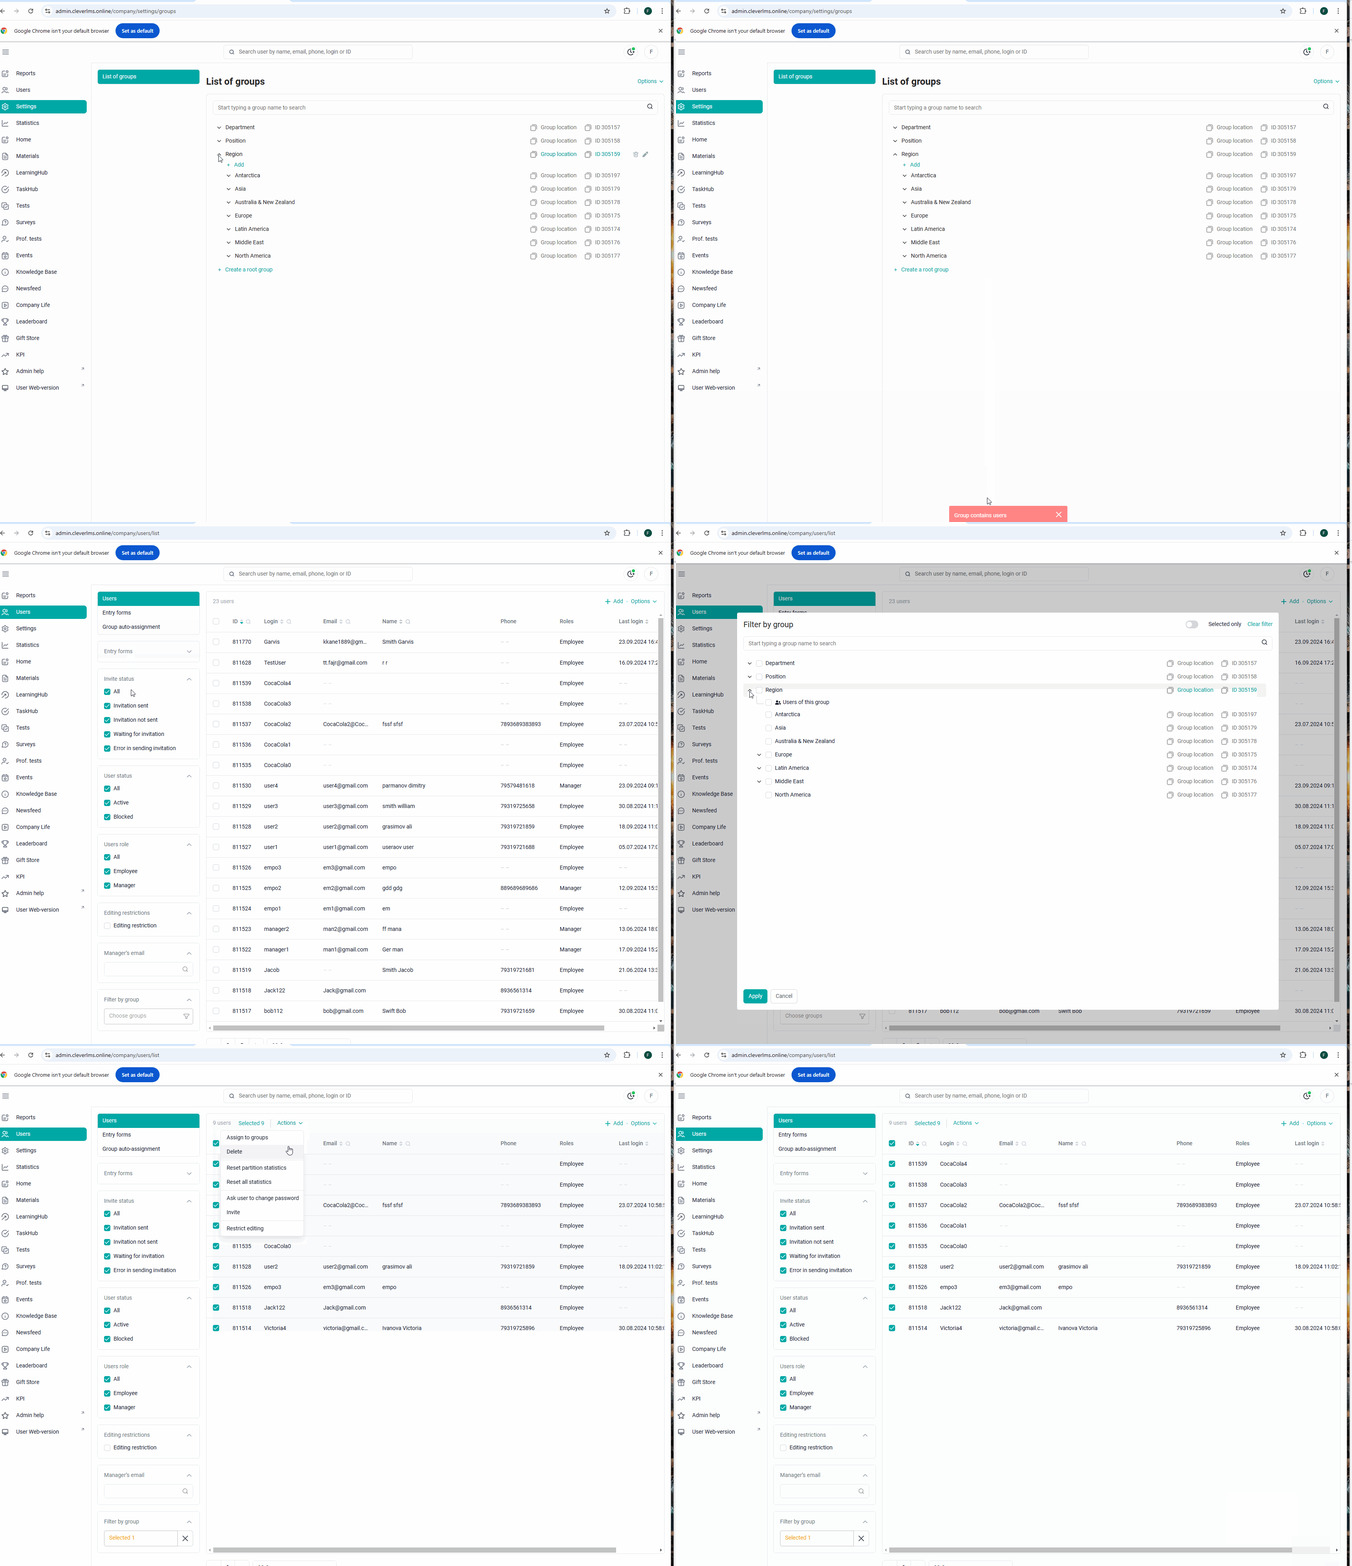
You can delete groups if there are no users and auto-assignment in these groups.
If there are users in the groups, first change the group values for them and then you can delete empty groups.
To delete a group, hover over it, click on the trash can and select Done in the confirmation window.
If you try to delete a group containing subgroups, the subgroups will also be deleted. To delete a group, hover over it, click on the trash can and select Done in the confirmation window.
When trying to delete a group (even without users) that is available in the correspondence table in the Auto-assignment of groups section, an error is displayed: "This group is filled in automatically. To delete it, delete the entries containing it from the correspondence table."

Note: Administrators on the platform are registered by the support service upon request. An article on this topic in the link.
Thus, you can independently set up a flexible and convenient structure for your company in the "Settings" section.
You can also read articles on this topic:
Adding and editing groups
How to fill in the group import template in the "Settings" section
Export Groups
After we have added the groups:
1. We register employees in them.
2. Add content and set access to it according to these groups. And users who are in groups to whom the content is open will see it and will be trained.
3. You, as an administrator, will upload statistics on users or groups of users to monitor the dynamics of training.
